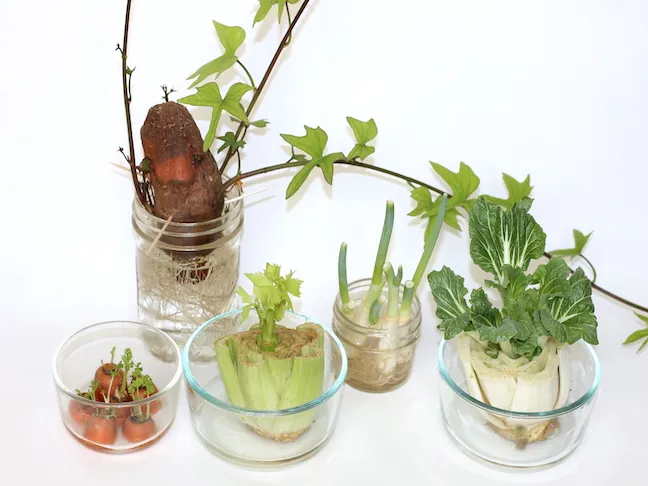
I first heard about kitchen scrap gardening through my best friend about six months ago. She told me about how she just chops off the bottom of her celery and places the stub in a small bowl of water, and within a few weeks new stalks begin to grow.
My son Kai is obsessed with gardening. We’ve transformed the backyard into his “garden workshop.” He currently is growing over twenty-five varieties of fruit and veggies. So when my friend told me about the celery, we just had to try it. It totally works!
Every time I cut celery, I place the end in a bowl and we grow the stalks then stick it in the ground.
After some research, I found that there are many varieties of veggies that you can do this with. So I thought Kai and I should conduct an experiment to see what grew best. I recommend using organic veggies as much as you can. If they aren’t organic, you can’t guarantee they weren’t sprayed with something that will stump their regrowing potential.
The best part of this kitchen scrap plants experiment is that if you get in the habit of it, you can actually save some money off of your grocery bill. Score!
As you can see below, not all of our kitchen scraps grew. But I’ve included a list of kitchen scrap plants that will definitely grow below; try mixing in a few that won’t make the cut if you’re doing this with your kids so that they can discover on their own what works and what doesn’t.
RELATED: 101 Easy & Fun Kids Crafts
Supplies:
- Kitchen knife
- Cutting board
- Bowls or jars filled with shallow water
- Toothpicks
Plus, any of these kitchen scrap plants that are easy to regrow:
- Bok choy
- Celery
- Carrots
- Avocado
- Pineapple
- Ginger
- Potato/sweet potato
- Green onions
- Lettuce
- Lemongrass
- Bean Sprouts
- Onions
- Fennel
*Remember, if you’re conducting an experiment, throw in a few scraps beyond these that might not work. Maybe you’ll get lucky!
Instructions:
Step 1: Chop the ends off the bok choy, celery, and green onions. Chop the tops off of the carrots and pineapple. Peel one clove off of a garlic root.
Step 2: Stick toothpicks in the bottom of the pineapple, garlic, and sweet potato.
Step 3: Fill mason jars and bowls (or clear plastic cups if you’re afraid of breakage) with a little bit of water. You want the water to just cover the bottom of the veggie.
Step 4: Wait and allow nature to work her magic.
Step 5: Keep an eye on the bowls. If the water evaporates, refill it. Also, check to make sure none of the veggies are getting moldy. If they do, either throw them away or peel off a few layers. (I had to do this a few times because some of the layers were getting yucky.)
*Note: I took the first and final shots about two and half weeks apart from each other.
Conclusion:
Pineapple: I realized that the water method wasn’t working. The bottom of the pineapple was getting moldy. I’ve grown pineapple plants before by just slicing off the top and placing it directly in the ground. So, to save it, I simply planted the top in the ground. The pineapple seems happy now.
Garlic: Absolutely nothing happened. Epic fail!
Bok choy: I am thoroughly impressed with how fast and full the bok choy has grown. I think I’ll be eating a tasty stir fry dinner in the near future.
Carrots: These little babies are doing pretty well. I think within the next few weeks they will be ready to plant in the ground.
Green onions: These are doing great. I think I’ll be able to harvest them in about two or three more weeks.
Potato: It got really moldy very quickly. So I had to throw it out.
Sweet potato: We actually started growing this sweet potato about two months ago. It wasn’t until about a week ago that the shoots started to really grow.
More Kids’ Projects:
