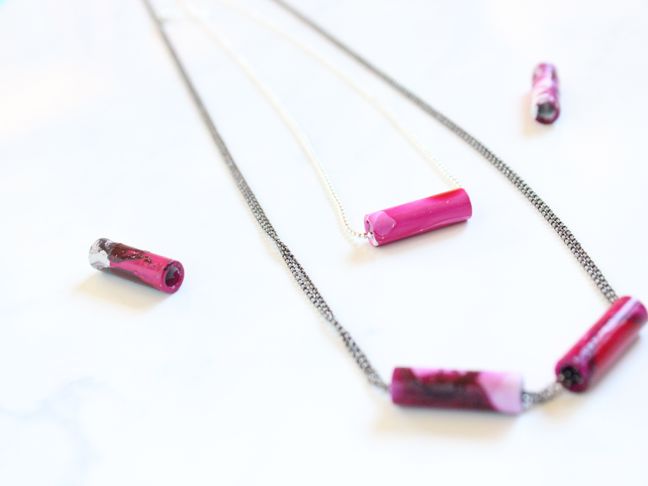
My six-year-old daughter loves jewelry and nail polish. After a recent trip to the hardware store (in aisle nine, to be exact) we had a light bulb moment. Let’s combine the two for the ultimate colorful DIY accessory. We played around with pretty nail polish, conveniently located in the drawer upstairs, and found a fun way to incorporate the polish on a bar necklace, otherwise known as a steel spacer. Together, we spent a school night crafting trendy DIY marbled necklaces for her and her friends. Honestly, I want one, too.
My daughter loves how each one turned out differently, and I love the minimal mess. Plus, the price just can’t be beat. Who knew a trip to the hardware store would inspire us to make jewelry? Guess it just goes to show that inspiration can truly be found everywhere, and objects are not always what they seem.
RELATED: How to Marble with Nail Polish
Supplies:
- Steel spacers, The Home Depot ($7 for a pack of 5)
- White spray paint
- Nail polish
- Wood skewers (2–3)
- Popsicle stick
- Disposable container
- Sealant
- Silver or gold chain necklace (can be found cheap at a store like Walmart, Target, or Claire’s)
Instructions:
Step 1: Spray paint the spacers white. You can try this project with silver spacers. I chose to paint them white because I didn’t think the nail polish color would pop as much on silver.
Step 2: Prep all materials and craft space. Once the spacers are fully dry, fill the disposable container with warm water.
Step 3: Insert the wood skewer through the spacer. Hold one end of the skewer, and keep the spacer on the other side to dip it in the water quickly.
Step 4: Drop the nail polish into the warm water. You have to move fast on this step, so make sure you have the spacer and skewer in hand and ready to go. This is an easy project; however, the nail polish hardens quickly, so you must move swiftly.
Step 5: Once you drop nail polish in the water, either leave it as is, or swirl it with the tip of another skewer, and then dip the spacer in the nail polish immediately. The nail polish will promptly stick to the spacer.
Note: If the nail polish hardens too soon, or you want to change colors, just use a popsicle stick to remove the polish from the water.
Step 6: Promptly remove the spacer from the water. Let the spacer dry for one to two hours.
Step 7: Once dry, spray a sealant over the spacers.
Step 8: Loop each spacer through a chain.
Step 9: Next time you go out, accessorize!
More DIY Craft Projects for Kids:
- 15 Insanely Cool DIY Pallet Projects for Kids
- 15 Affordable DIY Rock Projects for Kids
- 31 Ridiculously Epic Baby Food Jar Crafts
Save
Save
Save
