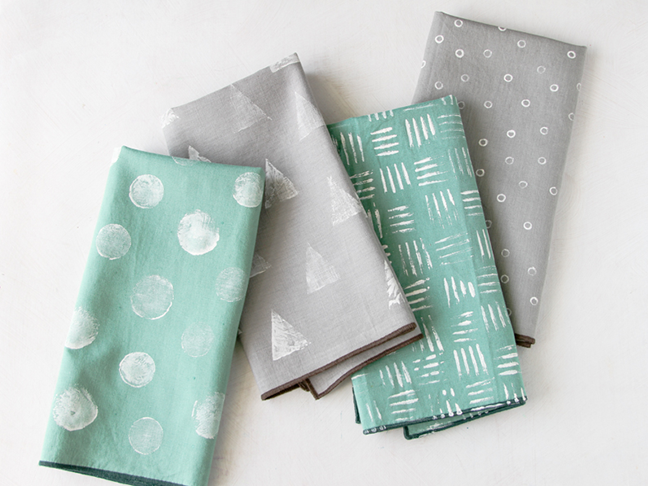
Use what you already have in the house to make cool stamped napkins for entertaining, parties, or everyday use. This a great way to occupy the kids with a fun activity; they’ll enjoy creating these stamped napkins DIYs while learning how to be resourceful.
Bonus! This project isn’t just for fun. It’s also quite functional. And kids will love using their newly crafted napkins at mealtime every day.
Here’s what you’ll need to recreate these stamping techniques at home…
Supplies:
- Cloth napkins
- Fabric paint
- Scrap cardboard
- Scissors
- Plastic fork
- Paper straw
- Plastic bottle caps
Instructions:
Before getting started with the stamping process, you will want to prewash your napkins, dry them, and iron them if they are especially wrinkled. Once these steps have been completed, you can start with the stamping process.
Technique 4, Polka Dot Bottle Caps Pattern: Recycle bottle caps in various sizes to create a polka dot napkin pattern by dipping bottle caps into paint and then stamping them onto the napkin. *Look for caps with completely flat tops, as opposed to ones that are slightly rounded over the top.
Once the paint is dry, they are ready to use, unless the packaging on your fabric paint says otherwise. (Some fabric paints require a heat set after the paint is dry.)
Since fabric paint was used, and not regular paint, the napkins will remain soft and machine washable, which is great.
As a final tip, if you’re having trouble finding fabric paint in the exact color or colors that you are looking for, you can use regular acrylic paint (which has vastly more color choices available at the craft store), mixed with a textile medium, like this one.
More DIYs for the Home:
