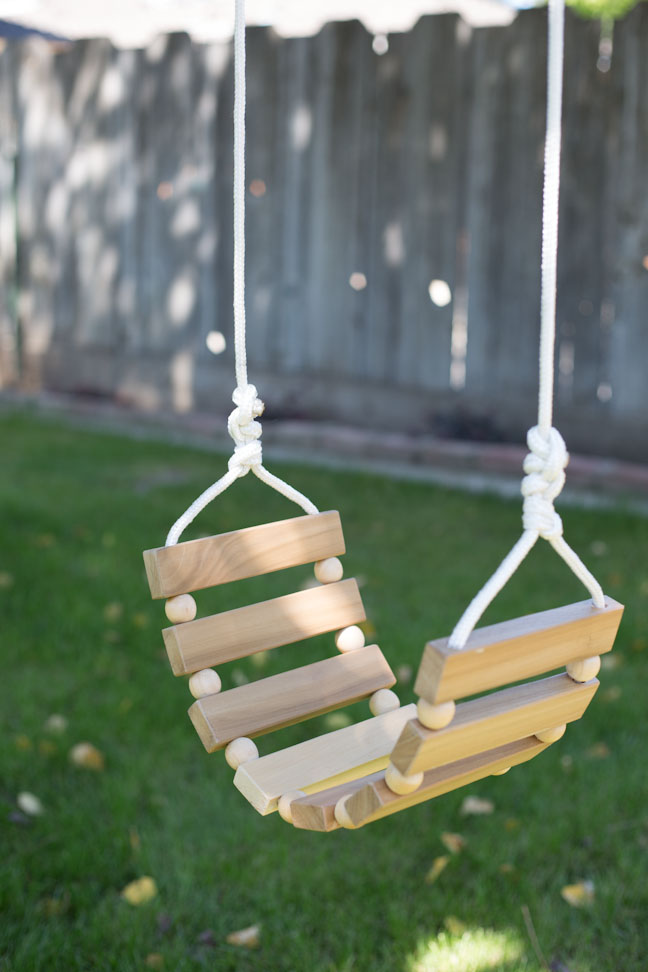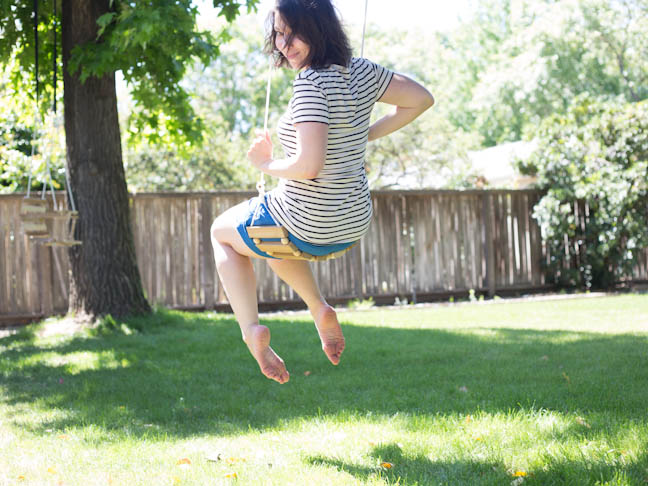
After I built my baby boy a swing, I realized I had enough scrap materials to make another one that will last him into his teenage years. Bonus: It’s big enough that my wife and I can use it too! It’s now my favorite thing to head out to the backyard and all swing together until the sun goes down. Here’s a super simple DIY tree swing that you can make in no time at all.
Disclaimer: Momtastic and Totally Her, LLC hold no liability if you create a swing according to these instructions. It is up to you to make sure your knots are tied correctly and your swing is hung properly. Only you can be responsible for you and your child’s safety, so please be careful and proceed with caution.
Supplies:
- 5 feet of 1-inch x .75-inch wood planks
- 1-inch wooden beads
- 20 feet of ⅜-inch braided nylon rope
- drill
- ⅜-inch drill bit
- sandpaper
- 2 metal rings
- polyurethane sealer (optional)
- tree swing hanging apparatus of your choosing
Instructions:
Step 1: Start by cutting your wood down to the proper sizes. You will need eight pieces of wood cut to seven inches in length. Then, using your sandpaper, sand all the hard edges down to rounded corners.
Step 2: Drill ⅜-inch holes in the wood as illustrated in the above image. The holes should be ¾ of an inch in from the outside edge of the planks. Depending on the wooden beads you can find, you may need to drill their holes to be ⅜ of an inch as well. The best way to accomplish this is to put them in a clamp and then drill the hole. You will need fourteen beads in total.
Step 3: Cut your rope into two ten-foot lengths. You want a nylon rope that is rated to carry a large amount of weight, and one that won’t unravel when being threaded through these holes. When you cut the rope, wrap the ends in masking tape to hold the outer layer together—you will burn the ends to seal them when the swing is complete.
Step 4: Do the same on the other side.
Step 5: Pull each side of the rope through so there is about a foot of rope sticking out on the opposite corners of the swing. Tie the short end of your rope to the long end of your rope, forming a triangle, using an anchor bend knot. The knot will be slightly adjustable before it is tightened, so position the swing how you like it and leave the amount of rope you want between the knot and the planks before pulling it tight on both sides.
Step 6: With that, your swing is complete! All that is left is to adjust the length of rope to the height you need, and attach the metal rings using the same anchor bend knots. Optionally, you can seal your wooden swing with some polyurethane to protect it from the elements and give the wood a fine smooth finish. Then you can hang the swing from your tree using appropriate hanging equipment. Please remember to be safe and properly test all of your knots and connections before placing a child in the swing. Be sure to use properly rated weight-bearing products and only use the swing under direct adult supervision. If you tie your knots correctly and use the right rope and connectors, your swing should be able to support up to 200 pounds. Be safe and have fun!


