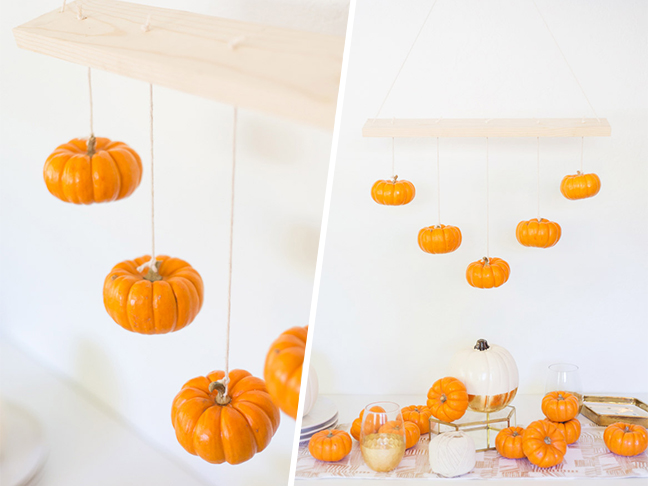
Fall is in full swing, and it is time to start planning some delicious holiday meals. Before any cooking starts, though, be sure to decorate your house for fall and make a memorable tablescape. Each fall there are always so many fun pumpkins around, so this year I decided to hang some from the ceiling as a fun DIY pumpkin chandelier. This simple DIY just takes a bit of wood and string to make a beautiful hanging centerpiece for your table.
Supplies:
- mini pumpkins (with large stems)
- twine or string
- wood plank
- drill
- washi tape
Instructions:
Step 1: Cut your wood piece to your desired size. It will depend on the size of your table and how many pumpkins you want to include. Line up your pumpkins along the length of your wood and drill a hole where each pumpkin will hang from. Drill an additional hole on each end of the wood to hang from the ceiling. I used a small piece of 1×4, but you could also go for a more rustic look with a tree branch.
Step 2: Drill a hole through the stem of each of your pumpkins.
Step 3: Tie a string through each stem and cut enough length to hang from the piece of wood. If your string has trouble going through the hole, wrap it in washi tape to help thread it through.
Step 4: Thread each pumpkin thread through the wood plank, and adjust the length to create the look you want. I created a downward pointing arrow, but you could do them all the same length, or all at random lengths.
Step 5: Trim all your threads, and string a length of thread through each hole on the end of your piece of wood to create the hanging mechanism. Length will depend on how high you want it to hang.
Step 6: Hang your new pumpkin chandelier over your table, or even on your front porch!
More DIY Pumpkin Crafts:
