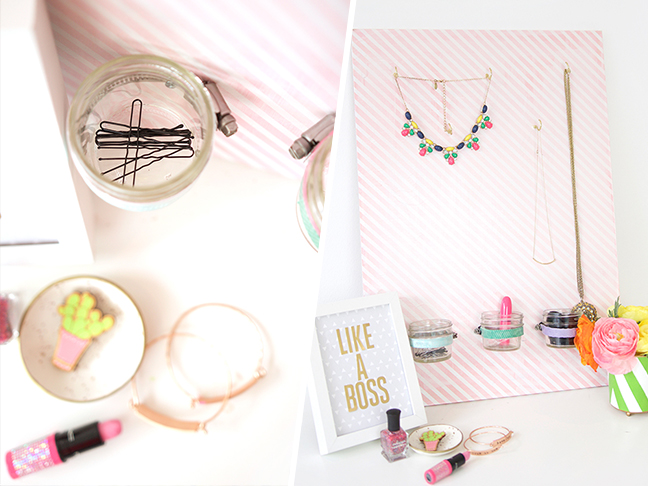
I’ve lost about thirty hours of my life to untangling necklace chains. I’ve purchased roughly 5,000 bobby pins, and I currently have seven that I can find. And mamas, if you have a little girl, you know the trouble doubles. Tiny barrettes, hair ties, and clips become a disaster of a mess in a bathroom drawer, and when you’re trying to get out the door in the AM, you can never find a matching pair of clips to save your life.
The struggle is really real…until this very moment when I will solve all your organizational woes in an hour with about $30 in supplies. You’re welcome!
You can create this simple DIY jewelry organizer with supplies from the hardware store and put an end to your the tangled-necklace and rogue hair tie woes in your household. Let’s get to it, before you lose another bobby pin.
Supplies:
- A piece of 1/2″ thick Medium Density Fiberboard (MDF) cut to 12″ x 18″ (You can cut it to any size you wish depending on your space and needs.)
- 3 4-ounce mason jars
- gift wrap (You’ve got tons left over from the holidays!)
- scissors
- foam brush
- decoupage glue like Mod Podge
- 1 inch cup hooks (available in the nail/screws aisle of most hardware stores)
- hose repair clams (located in the plumbing aisle of that hardware store you went to for the cup hooks)
Instructions:
Step 1: First cut the gift wrap to 3–4″ larger than the MDF on all sides.
Step 2: Pour decoupage glue onto the MDF and use the foam brush to spread it around.
Step 3: Keep brushing until you have a liberal coat of glue on the entire surface of the board.
Step 4: Smooth the gift wrap onto the board. You can add more decoupage glue as needed if you notice there are dry spots that are not adhering well.
Step 5: Use scissors to trim each corner of the gift wrap as shown.
Step 6: Brush the underside of the board…
Step 7: …then fold over the overhanging flaps of gift wrap and apply a bit more glue to the edges to keep them in place.
Step 8: Apply a thin coat of glue on top of the front of the board. This will help seal the gift wrap into place.
Step 9: Use some good ol’ elbow grease to twist the cup hooks into the board.
Step 10: Use screws and a screwdriver to place the repair clamps onto the board.
Step 11: (Optional) Use a bit of washi tape to cover the repair clamps. This makes things look a little prettier…and we all love prettier.
And just like that your goods are under control. Happy crafting!
More DIY Organizational Projects:
