I have three children, ages 4, 6, and 8, which means I’ve been trying to perfect our bedtime routine for eight years now. Every night we read books, tell stories, and say our prayers, followed by hugs, kisses, and “I love you to the moon and back” exchanges. I have learned that my 4-year-old can’t go to bed without a nightlight. My 8-year-old can’t imagine closing his eyes for the night without a full glass of water next to him (even though he never actually takes a sip). My daughter can’t sleep until she talks for 10 minutes or so about her day.
But there’s one thing that can disrupt even the most seamless bedtime routine: Bad dreams. You know, the type of nasty nightmare that stays with kids and makes them hesitant to sleep in their own beds the next night. I recently realized that we needed something to keep those bad dreams far, far away (or, that would at least convince my kids that they were far, far away).
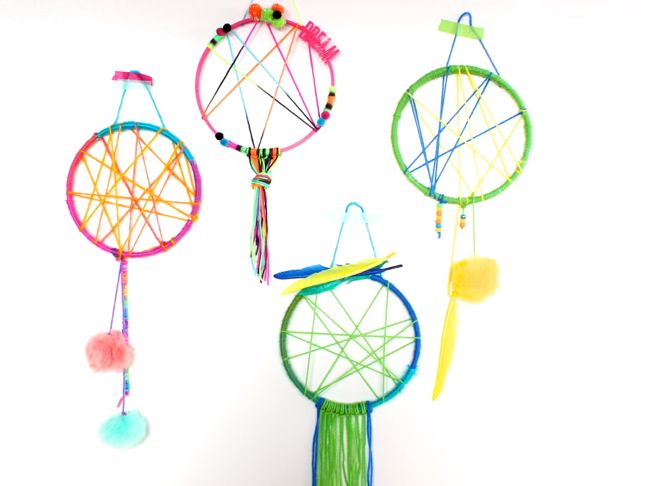
After some research, I found a solution: Dream catchers. I’d always heard about dream catchers — believed by Native Americans to have the power to trap bad dreams and let only the good dreams pass through — but I’ve never had one of my own. Since I love to craft, and am a mom desperately in need of sleep, my kids and I spent the afternoon making colorful, DIY dream catchers together. They each have a new favorite decoration, and I actually have some peace of mind when the dreaded bedtime hour approaches.
Here’s how we created our dream catchers:
Supplies:
- 6-inch embroidery hoops, wood or colorful plastic, (use both hoops in the package)
- Yarn, colorful
- Washi tape
- Pony beads
- Faux fur pom-pom key chains
- Feathers
- Hot glue gun (and hot glue)
Instructions:
Step 1: Gather supplies. You won’t want to waste time hunting for beads or yarn once you start making your dream catcher!
Step 2 (optional, for extra color and texture): Wrap the hoops with yarn or washi tape. We created one hoop with only small areas covered in yarn, and it worked great.
Step 3: Cut a long piece of yarn to use for the “spider web” inside the hoop. Use the hot glue gun to glue one end of the yarn along the hoop, and begin to pull and wrap the yarn in various directions around the hoop for a “web” effect. Tell the kids to keep the yarn pulled tight so the “web” is not loose. If any of the yarn slides along the hoop, use a dab of hot glue to keep it in place.
Step 4: Decorate the dream catcher. We glued plastic letters to spell DREAM, and mini pom poms to decorate one of the hoops. On the others, we hung yarn, feathers, strings of beads, and faux fur pom poms from the bottom of the hoop. Tie knots along the bottom of the hoop at different lengths to hang all of the decorative accessories.
Step 5: Hang the dream catchers with washi tape or hooks. You can even loop it around your child’s bed post. Hang one or several, and tell your kids to get ready for sweet dreams!
