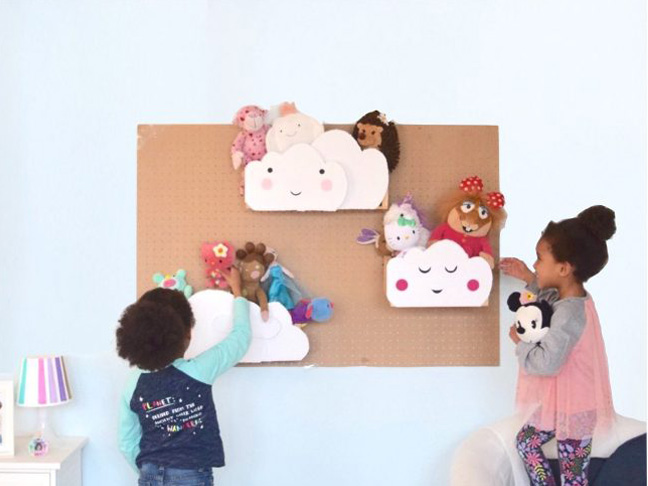
Sure, maybe it’s my fault that we have a million stuffed animals. I mean, half of the stuffies my kids play with (and leave all over their rooms) were mine when I was little. I just couldn’t bring myself to part with my Cabbage Patch kids, Care Bears, or Hug-A-Bunch dolls. Yeah, Hug-A-Bunch. I still have one of those bad boys, thanks to my mom’s uncanny ability to store, organize, and label things with museum-like archival skills.
My old-school toys spark up nostalgia, so they’re definitely worth keeping for decades, right? What about the stuffies the kids get as freebies at the town’s Fire Department Open House, the Daddy/Daughter Dance, and the Easter Egg Hunt every year? I don’t care about any of those, but the kids just can’t seem to part with any of them. So, instead of begging and pleading that they’ll reduce their stash, I figured it was high time we come up with a cute, space-efficient stuffed animal storage solution. Enter these DIY cloud pallet crates; they’re the perfect way to get stuffed animals off the floor.
The best part of the peg board system is that each cloud can be moved again and again to reconfigure the spacing. You can also easily expand the design by adding another peg board without putting a million holes in your wall each time for the individual baskets.
Supplies:
- various pallet crates
- peg board
- peg board hooks (2 per crate)
- white foam board
- heavy-duty scissors
- pencil
- hot glue and glue sticks
- pink and black scrapbook paper (optional)
- 1″ circle craft punch (optional)
- 1/2″ circle craft punch (optional)
- glue stick (optional)
Instructions:
Step 1: Measure the width of each crate. Using a pencil, freehand draw a puffy cloud the same width (or slightly larger) onto the white foam board. Using heavy-duty scissors, cut out each cloud. Create smaller clouds to overlap and give your shapes dimension.
Step 2: To create the face for your clouds (optional), use the pink scrapbook paper and the 1″ circle punch for cheeks, black paper and the 1/2″ punch for eyes, and freehand cut a mouth. If you’d like your cloud to align with the bottom of the crate (as shown here), leave each cloud’s bottom edge straight rather than puffy. Adhere the shapes to the clouds using a glue stick.
Step 3: Align the cloud with the bottom edge of the crate, and attach it to the front of the crate using hot glue.
Step 4: Decide how high up on the wall you want the peg board. Make sure it is easy for your child to reach, so they can retrieve and replace the toys on their own. If you’d like it slightly higher, keep a step stool nearby for your child to use. Along with a buddy, use a level to ensure the peg board is straight. Have your friend hold the board in place while you secure it with screws in each corner.
Step 5: Position peg hooks for each pallet crate, and add cloud crates. Adjust to achieve the proper position. Readjust as needed to maximize spacing when new/bigger stuffed animals are added.
