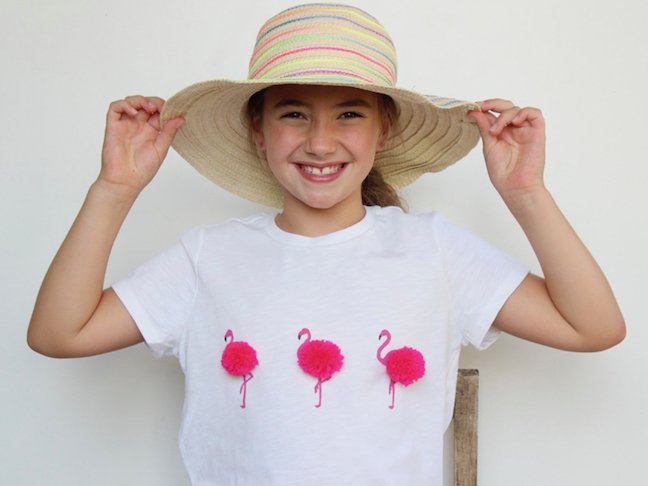
The flamingo may just be the new unicorn! The popular pink bird is on just about everything from sunglasses, planters, and water bottles, to towels and totes these days. I don’t know if it’s the summer heat or the bright pink color but my daughter and I are feeling the flamingo frenzy. We also share a love of all things pom pom adorned. After making pom pom earrings, bags and scarves, the next logical step was to make a DIY pom pom flamingo t-shirt! Talk about having the best of both worlds!
All you really need for our latest craft venture is a little bit of paint, and some adorable pom poms. They will transform an ordinary white t-shirt into a playful DIY flamingo t-shirt. This has tropical vibes written all over it. Try it out this weekend; no sewing of any kind is necessary, so it’s a great way to spend time together, and you’ll be day-dreaming of the beach, pineapples, and palm trees. What’s not to like about that? Let’s get started…
Materials:
- Fabric medium, Liquitex
- Acrylic paint, pink and black
- Paintbrush
- Pink yarn
- Fork for DIY pom poms
- X-Acto knife
- Scissors
- T-Shirt and cardboard
- Peel n stick permanent fabric fuse tape
Instructions:
Step 1: Make DIY pom poms (or buy some). This is a craft you may get addicted to because it’s easy and fun. There are a variety of ways to make pom poms. I used a fork. First, wrap the yarn around the wide part of the fork approximately 40-60 times. Once it’s wrapped, cut a piece of string about 6 inches long and insert it through the center of the fork. Grab each side of the string and tie a tight knot. The knot should be in the center of your wrapped yarn. Now, remove the yarn from the fork. If the knot doesn’t look tight enough, you can use another piece of string to tie another tight know. Next, begin to cut the yarn where it’s looped on the sides. You will see a pom pom start to form the more loops you cut. Continue until a pom pom is formed. Do not cut the center knot. Continue to shave, or cut with the scissors until a round pom pom is formed.
Step 2: Combine the fabric medium with the acrylic paint. The ratio is 2:1, medium to paint. Stir the mixture well.
Step 3: Find a flamingo illustration online, re-size in Microsoft word, and print it out. Trace the image with a pencil onto freezer paper. Once the entire image is traced, use an X-acto knife to cut it out.
Step 4: Insert a piece of cardboard into the shirt so the paint doesn’t soak through. Iron on the freezer paper onto the shirt. The iron setting should be medium to high, with the steam setting turned off.
Step 5: The freezer paper is a stencil for the shirt, so now use a paintbrush and paint with the lines of the stencil.The kids will love this part.
Step 6: Once the stencil is painted, peel the paper up to reveal the design. When the paint is dry, you can add the black color to the end of the beak on the flamingo. I freehanded those parts.
Step 7: Now, it’s time to stick the pom pom on the body of the flamingo. I chose the easy route – tape. To do this, first, add a small piece of tape one side of the flamingo, pull the white paper off, and stick to the shirt. It’s that easy.
Step 8: Wear it, and accessorize it with a fun hat.
