If you have a daughter like mine, you know her young world revolves around rainbows and unicorns. They are are trending all over the internet, and in our local stores. The mythical, powerful and magical creatures have found their way into little girls hearts and minds everywhere. In fact, they made their way into more than just their hearts and imaginations; you can find them on just about anything from clothing and accessories, to sleeping bags, pool floats, stuffed animals and makeup (Unicorn Snot to be exact). And of course – there’s unicorn decor.
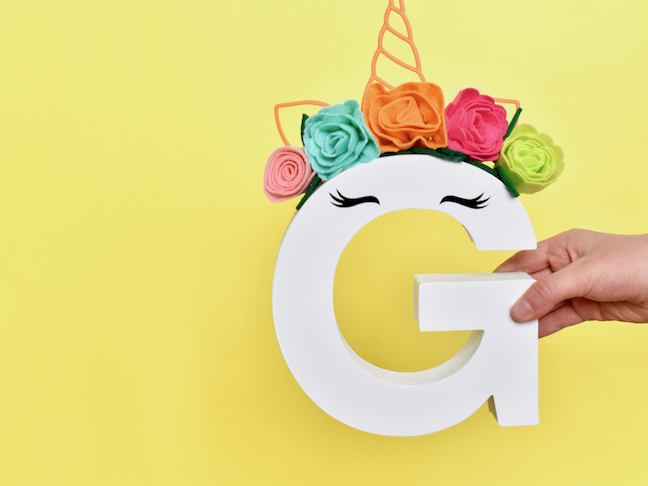
But these things can get expensive so we try to craft our own unicorn decor and other projects to save money. We even made a DIY mason jar night light topped with a unicorn. She still uses it every night. Now, we’re adding wall decor to her room with a DIY unicorn letter. The pretty G unicorn sits above her desk, and keeps that unicorn magic alive when she plays and sleeps.
I’ve come to the conclusion that every unicorn lover needs this DIY letter unicorn in his/her room. If your throwing a unicorn birthday, this would be a perfect craft or favor for all those sparkly-eyed guests. It’s so simple to made. Most the items are store-bought, so even if crafting is not your thing, you can do this!
Here’s how we made the DIY unicorn letter.
Materials:
- Paper Mache Letter, Target
- Acrylic paint, white
- Felt flowers (I used flower from this headband)
- Hot glue gun and hot glue
- Unicorn horn, homemade or store-bought
- Vinyl black eyelashes, or black acrylic paint
Directions:
Step 1: Paint the letter G white.
Step 2: When the paint on the letter is dry, begin to glue the crown. I bought these unicorn headbands for my daughter’s Valentine’s Day gift for friends, so I used one of them for the unicorn horn. You can find a felt one, or make one, and glue it on top. If you use a headband horn like me, measure the height of the horn, and then snap the bottoms off each side so it’s hidden behind the letter. Now, glue the headband to the back of the letter.
Step 3: If you use a headband with felt flowers like me, first cut or remove the flowers from the headband. Now, glue them on top of the letter with the hot glue gun.
Step 4: Next, add the pretty eyelashes. I used my electronic cutting machine to cut the eyelashes with black vinyl, but eyelashes could easily be painted on the letter with acrylic paint.
Now, get ready for some requests, because once your daughter’s friends see this letter in her room, they are going to want one just like it!
