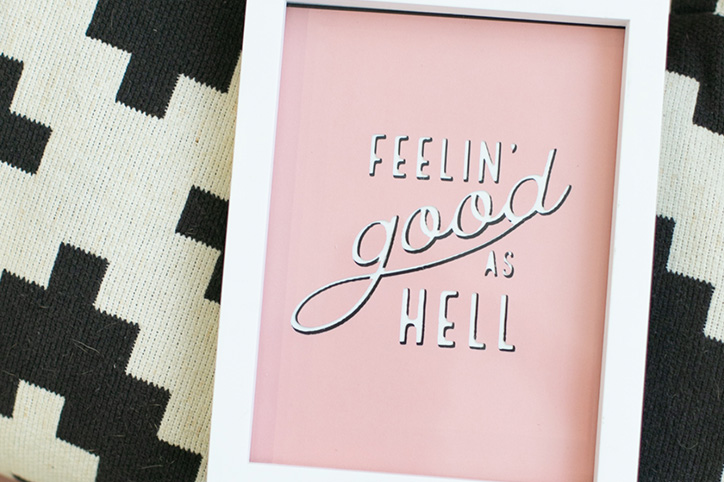
I dare you to listen to a Lizzo song and not feel inspired! The reigning queen of female empowerment has us all under her spell, and we are not mad about it. If you’re not familiar, Lizzo is the recording artist responsible for hits like “Truth Hurts” and the song that inspired this little DIY: “Good as Hell.” Her music (and her vibe) is all about empowerment and self love. And if that’s not enough reason to convince you that you need to jump on team Lizzo, she’s also a classically trained flute player and incorporates her flute playing into her songs and raps. I mean, come on!
So in honor of Lizzo’s uplifting, empowering, inspiring messages, we made this little DIY paper cut art to keep those good vibes flowing. “Feelin’ good as hell” is one of the lyrics in Lizzo’s repertoire, and it’s a perfect reminder to keep your chin up and find the good in your days. We’re thinking you should probably listen to the song while you’re making the project. Just sayin’.
Supplies:
- 3 sheets of cardstock: one white, one black, and one in your color of choice
- cutting machine like a Cricut (or an X-Acto Knife and some patience)
- printable Good As Hell template
- glue stick
- picture frame
Instructions:
Step 1: Start by downloading our Good As Hell template. If you’re using a cutting machine like a Cricut, you’ll upload the art into the design software and size it to your preference, depending on the size frame that you’re using. Set your machine to cut cardstock, load your paper, and cut the design out of your colored cardstock. If you’re using an X-Acto Knife to cut, you’ll print the design onto your piece of colored cardstock and cut it out using your knife. Make sure you save the inner parts of the letters from the word “good;” you’ll need these later.
Step 2: Repeat the process from Step 1 with the black cardstock, so that you now have the phrase cut out of two pieces of cardstock.
Step 3: Spread glue stick on the back of the black paper. Affix the black piece to the center of the white piece of cardstock. You’ll need to glue each individual inner piece for the letters in the word “good.” Make sure that you adhere them so that they are evenly placed within the empty space of each letter.
Step 4: Next, repeat the process with the pink paper, but you’ll offset it slightly so that a shadow of the black underneath is visible. This will create a nice visual and textural layer in the paper cut design. You can choose which way you’d like to offset the papers, depending on the look you want to achieve.
Step 5: Then, glue the inner parts of the pink words over the black pieces, offsetting them in the same way.
Step 6: Finally, trim the whole thing to the size of your picture frame. Insert the papercut art into your frame and set it on display! You could also choose to skip the frame and display it on a cool clipboard or with a fun photo hanger. Put it up somewhere that you can see it and get inspired on the daily.
