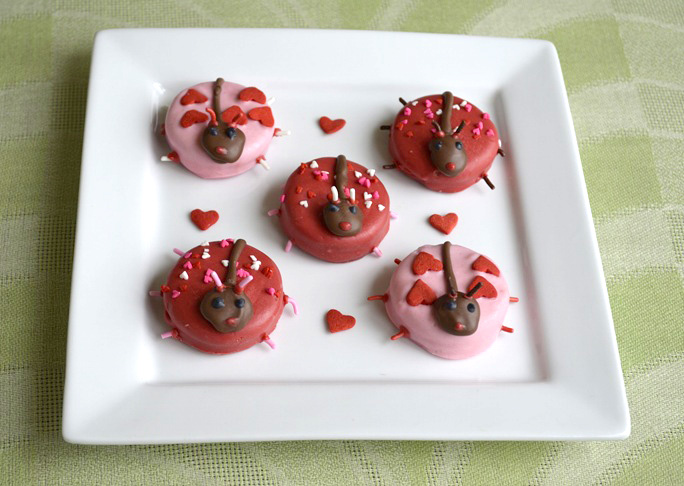
Ingredients:
- 12 round sandwich cookies (like Oreos)
- 1¼ cups white chocolate melts (or chips)
- 1.3 cup milk chocolate melts (chips)
- red food coloring
- pink food coloring
- black food coloring
- Paramount Crystals (paraffin wax flakes)
- toothpicks
- small heart sprinkles (optional)
- large heart sprinkles (optional)
- brown and/or red sprinkles
- plastic squeeze bottle with a small round tip (find in the candy-making aisle of your local craft store)
Preparation:
Step 1: Melt half of the white chocolate. Color the melted chocolate with pink food coloring until it is the desired color. If the chocolate starts to seize up (harden) while you’re adding the food coloring, add some Paramount Crystals to loosen it and make it flow again.
Step 2: Dip 6 of the cookies into the melted pink chocolate and coat them completely on both sides. You can use a teaspoon or small pair of kitchen tongs to turn the cookie in the chocolate.
Step 3: Lay the dipped cookies on wax paper to cool and harden.
Step 4: Reserve an 1/8 of a cup of the white chocolate and set it aside to use for later.
Step 5: Melt the remaining white chocolate (excluding the reserved 1/8 cup you set aside). Color the melted chocolate with red food coloring until it is the desired color. If the chocolate starts to seize up (harden) while you’re adding the food coloring, add some Paramount Crystals to loosen it and make it flow again.
Step 6 (optional): Sprinkle your heart sprinkles onto the cookies, being sure to only cover one half of each cookie, leaving room for the Love Bug’s head.
Step 7: Melt the milk chocolate and pour it into the plastic squeeze bottle with a small round tip.
Step 8: Use the squeeze bottle to pipe chocolate onto the dipped cookies to form the Love Bug’s head. To make the Bug’s head, pipe a half inch circle close to one edge of the cookie. Do this on all 12 cookies.
Step 9: Pipe a line of chocolate from the head across to the other side to form the line between the Love Bug’s wings. Do this on all 12 cookies.
Step 10: Melt the remaining white chocolate you reserved and add black food coloring to turn it black.
Step 11: Dab the end of a toothpick in the black chocolate, then touch it to the Love’s Bug’s head to make eyes. Repeat the process on all 12 cookies.
Step 12: Re-melt the left over red chocolate and use a toothpick to dab a little red chocolate on each Bug to create the mouths.
Step 13: Use a dab of melted red chocolate as glue to secure the brown/red sprinkles in place to form the Love Bug’s antennae, placing each antennae above each eye. Repeat this process on all 12 cookies
Step 14: Use dabs of melted red chocolate as glue to secure the brown/red sprinkles in place to form the Bug’s legs. On each cookie. place 6 matching brown sprinkles around the cookie’s base to form 6 legs.
Step 15 (optional): Sprinkle the heart sprinkles on the Love Bug’s in whatever pattern you desire.
Want more Valentine’s Day recipes?
- Raspberry Velvet Cupcakes Recipe
- Red Velvet Cake with Nutella Buttercream Frosting Recipe
- Pink Cupcake Pops Recipe
- Raspberry Heart Linzer Cookies Recipe
- 15 Valentine’s day Treats
Find more from Linette Gerlach at The Kids’ Fun Review.
